
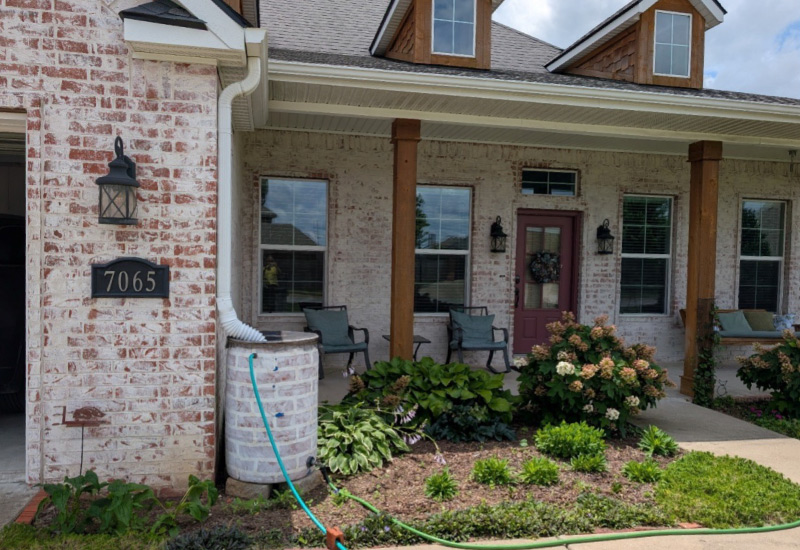
Ranking 8th in the nation for annual rainfall, Arkansas is a very water-rich state. Northwest Arkansas gets an average of 46 inches of rainfall a year. Using a rain barrel to water your landscape is an effective way to save on water bills and give Beaver Lake a little break!
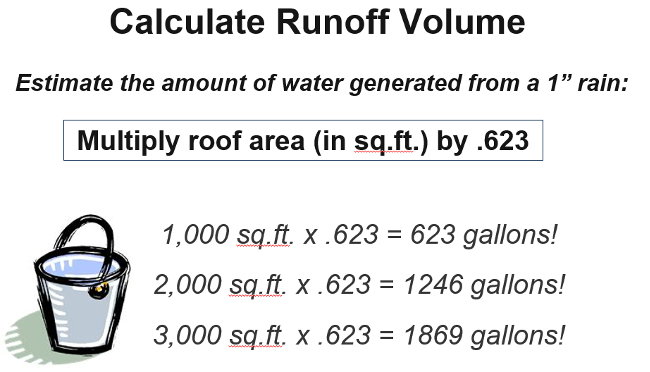
Before setting up a rain barrel, it can help to get an idea of how much runoff your property is producing. First, calculate the area (length x width) of impervious surfaces like rooftops, sidewalks, and driveways. Then multiply that area (in square feet) by .623. This gives you the number of gallons generated in a 1 inch rain. For example:
A 1,000 sq ft roof will generate 623 gallons of runoff in a 1-inch rain. Given an annual average of 46 inches, a 1,000 sq ft roof will generate over 28,000 gallons of free water in a year.
Where should you put a rain barrel?
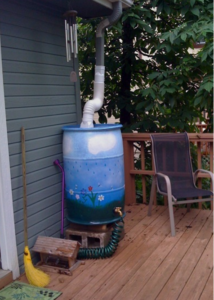
Observe your property, especially during a rain event, to decide where to put your rain barrel. Rain barrels function best when put under a downspout that is transporting rain from your gutters. If you have numerous downspouts to choose from, think of where it will be most convenient for use. For instance, pick a downspout that is close to landscaping beds that you regularly have to water. Also, keep in mind that gravity is your friend. Placing your rain barrel on a higher part of your property allows you to water with a hose anywhere downhill from the barrel. If you were to place the barrel at the lowest part of your property, you would need to fill watering cans and then walk uphill.
Buy or DIY?
Pre-made rain barrels are widely available online and at home improvement stores, and range in price from $100-$200+. If aesthetics is important to you, this might be your best option.
Rain barrel kits
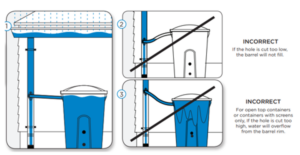
Rain barrel kits are widely available and most come with the needed tools, like hole saw bits. These kits frequently come with a downspout diverter that routes the excess runoff back down your downspout after the barrel is full.
This is a great option if you do not want to alter your downspout arrangement or want the option of putting your barrel away during winter or droughts. When using one of these types of kits, make sure to read all directions carefully, especially when drilling into your downspout, and ensure that the barrel orientation is correct so that your barrel fills and does not overflow.
 Sourcing a barrel
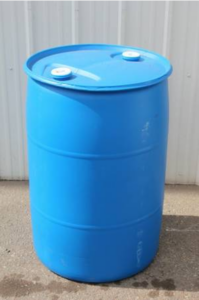
If you are going to DIY, you will need to find a barrel. Food-grade plastic barrels are the go-to option. These are very commonly used to transport things like agricultural chemicals, juices, condiments, really any bulk liquid. Facebook marketplace is a great place to find these barrels for cheap. Blue and white are common colors. A white barrel will let in sunlight, which will help algae grow in your barrel, so if you are using a white barrel, plan to paint it.
How to build your own rain barrel
If you are not using a rain barrel kit, you will need:
- Reciprocating saw
- Drill
- 1″ drill bit
- 1½” hole bit for bulkhead tank fitting and spigot
- Adjustable crescent wrench
- Staple gun or bungee cords
- Scissors or utility knife
- Food-grade plastic, 55-gallon barrel or other receptacle
- ¾” hose bibb (MIP threaded inlet) (AKA a plastic or brass spigot)
- ¾” bulkhead tank fitting with 1½” mounting hole
- ¾” x ¾” pipe-to-garden hose connector
- Teflon® tape (plumber’s tape)
- Fiberglass window screen
- Bricks or cement blocks
Step 1: Preparation.
Mark all cuts and holes to be drilled on your clean 55-gallon barrel. The overflow hole can be located on either side of the barrel and should be at least 2 inches from the top edge of the barrel. The spigot hole should also be 2 to 3 inches from the bottom edge of the barrel.
Step 2: Cutting and drilling.
Drill a 1″ pilot hole in the top of the barrel to start your saw blade and cut the top out of the barrel using a jig saw or reciprocating saw. Make sure to leave at least a 1″ rim to secure the fiberglass screen later. Next, drill the overflow hole at the top of your barrel with a 1″ drill bit. Then drill the spigot hole using a 1½” hole bit. Use a utility knife to smooth out the plastic burrs around all holes and cuts. Finally, clean the inside of the barrel to remove plastic shavings.
Step 3: Inserting fixtures and fittings.
Insert the bolt-shaped end of the bulkhead tank fitting into the barrel from the inside, keeping the rubber gasket between the “bolt” and the inside of the barrel. The plastic washer fits between the outside of the barrel and the nut of the tank fitting. These fittings have left-handed threads, so tightening seems backwards. Wrap the spigot in Teflon® tape and insert it into the bulkhead tank fitting. For the overflow, the hose-to-hose connector will screw directly into the plastic barrel in the 1″ overflow hole. If desired, you can use a 1″ internal diameter metal washer between the barrel and the overflow adapter to give more support to the fitting.
Step 4: Screening the top of your barrel.
Cut your fiberglass screen large enough to cover the entire top of your barrel to prevent mosquito breeding. Staple one edge of the screen to the rim of the barrel (12 o’clock), stretch the screen smoothly across and staple the screen on the opposite side (6 o’clock). Staple the screen at 3 and 9 o’clock, then fill in with additional staples around the rim of the barrel, keeping the screen tight as you staple. Trim off the excess screening material with a utility knife or scissors to give it a clean appearance. Bungee cords can be used in place of staples to make it easier to clean and winterize the barrel. Ensure a tight fit to prohibit insects from entering the barrel.
Step 5: Installing your rain barrel.
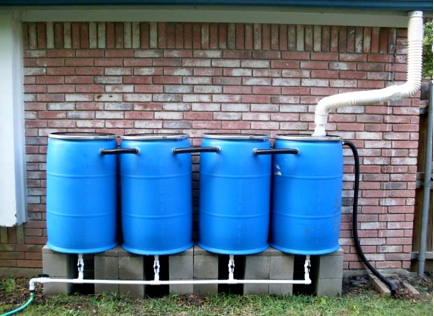
Your rain barrel needs to be raised above the ground to allow access to the spigot and provide enough head pressure to water your plants through gravity flow. Cinder blocks or landscape blocks work well as a stable means of raising rain barrels off the ground. Attach a hose to the overflow and direct it towards a landscape bed or your lawn.
Step 6: Cutting the downspout.
Once you know the height of the barrel, it is time to cut the downspout. Disconnect the elbow at the bottom of your downspout. Hold the disconnected elbow up to the downspout to mark where to cut the downspout to provide at least 2 inches between the elbow and the rain barrel so the barrel can be easily removed for future maintenance. Cut the down spout at the line and reconnect the elbow to the downspout.
Maintenance
Your rain barrel will need to be cleaned out periodically with a scrub brush and water. Window screens will need replaced every year or two or when it shows enough wear and tear. In the winter, care should be taken to not let your barrel freeze and crack. Put away the barrel for the winter or plan to drain it before hard freezes.
Using your rain barrel
Use your rain barrel to water your landscape and gardens. You can fill watering cans or hook up a water hose. Soaker hoses can also be used. The higher your rain barrel, the more head pressure you will get. It is best to use rain barrel water on ornamentals, trees and lawns, but if you choose to use rain barrel water on your vegetable and fruit plants, the safest way to do it is by watering the soil and not the plant itself. Direct contact of rain barrel water on the harvestable portion of the crop could result in chemical or pathogenic contamination. If rain barrel water is used to irrigate edible plants, wash the food thoroughly with potable water before consuming any part of the plant to reduce the risk of ingestion of potentially harmful pathogens or chemicals.
There are plenty of other uses besides watering your plants like washing your car, or washing other things around your property. My new favorite use is giving my dog a bath because she likes that the water isn’t too cold and high pressure like from the tap.
If you want to paint your barrel, make sure to use paint that adheres to plastic to prevent chipping.
By Kristen Crawley
County Extension Agent – Stormwater Educator
University of Arkansas Division of Agriculture
Cooperative Extension Service